The desktop version of the Crew app gives you access to all the organizational data you’re used to having at your fingertips, but with a broader view and additional flexibility for when you’re not on the go. When you’re in the office, Desktop Scheduling allows you to see and administer your team’s schedule in different ways.
You can choose to work with your Organization’s calendar in one of two modes
Team view gives Admins only a view of the team’s weekly calendar arranged particularly for Admins, and only from the desktop. For more info on the Team view, click here.
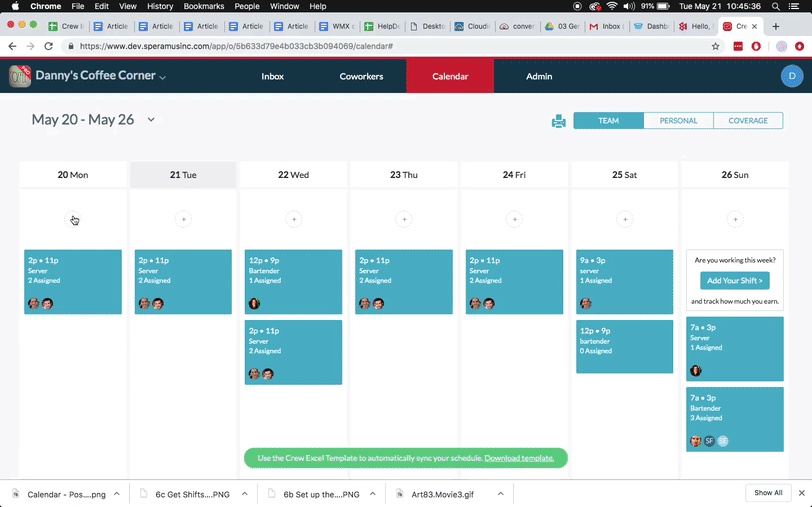
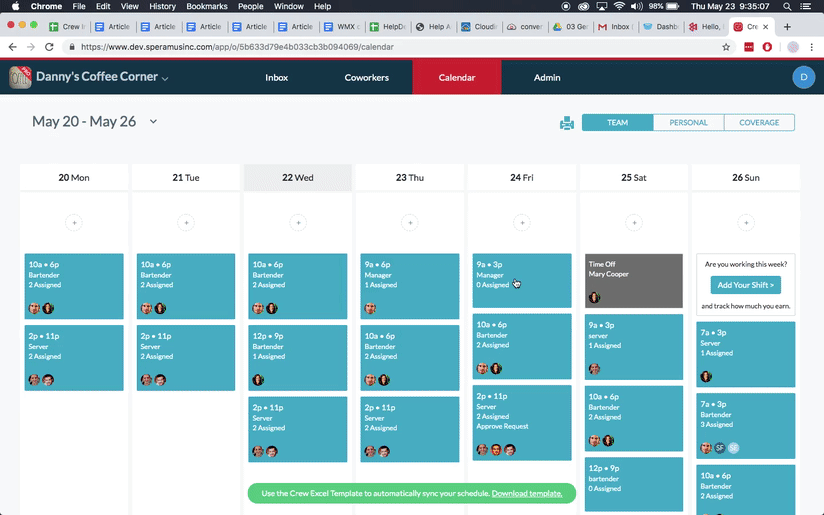
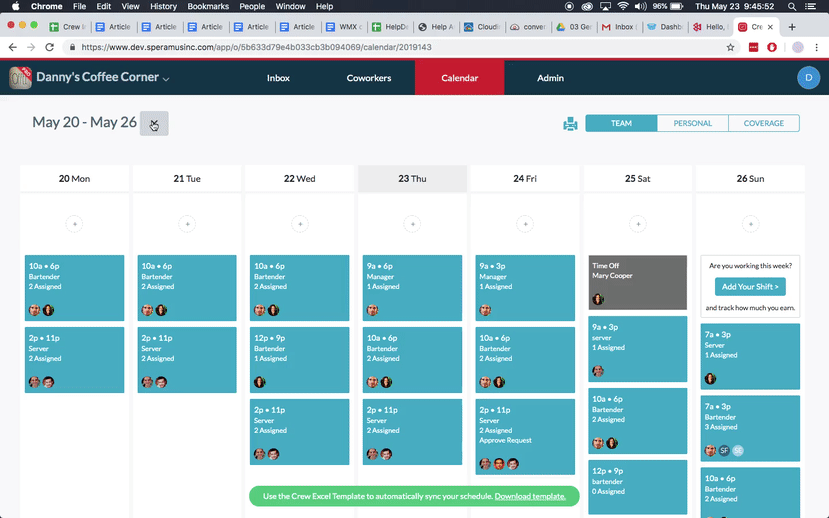
Agenda view offers the same view of your team’s weekly calendar that you have in the mobile version of the app. From here you can
- Add meetings and shifts
- Get shift coverage
- Request time off
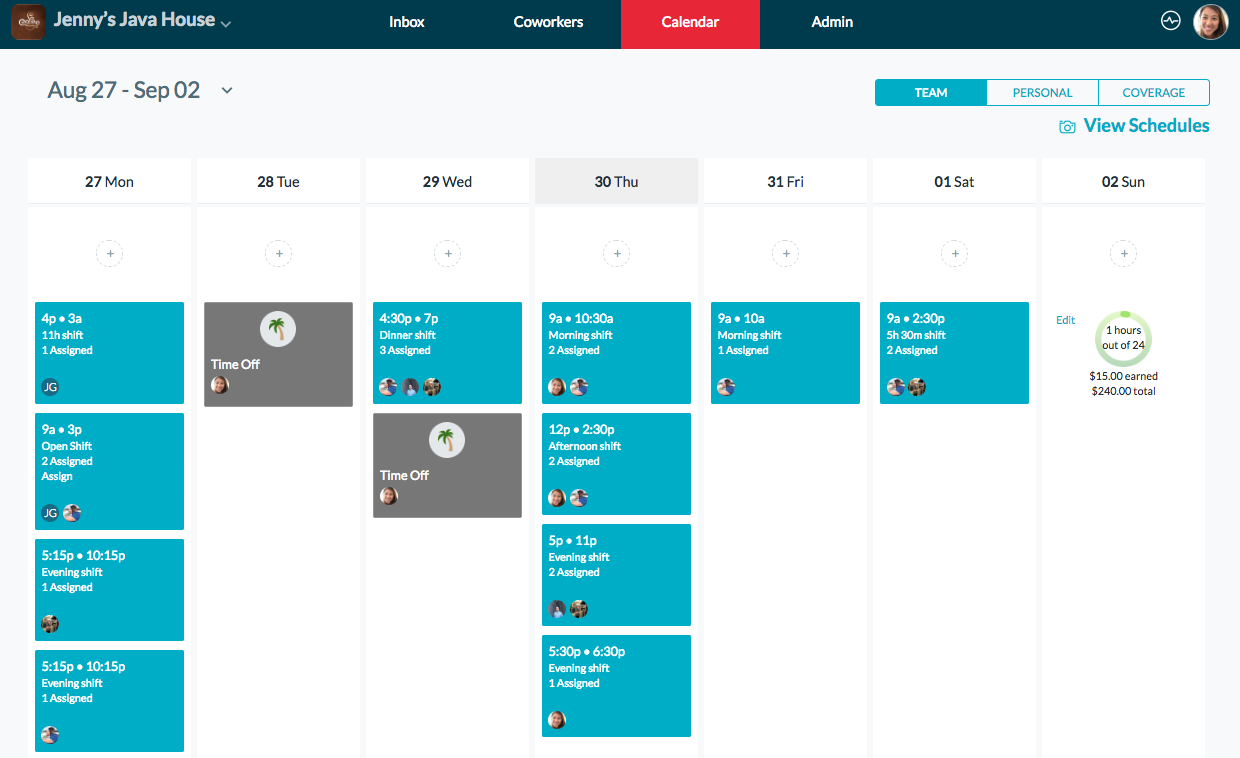
The Agenda view of the calendar is the same one you see on your mobile device
Adding and Assigning Shifts From the Agenda View
Create a Shift
- From the Calendar tab on your desktop be sure that you’re in Agenda view
- Click the “+” button on the desired date
- Select “New Shift”
- Input the shift details—title, dates, start and end times
- Leave it as “Just this once,” or choose to make it a recurring shift at whatever frequency you’d like
- If you choose to leave the shift unassigned for now, just click “Post” and you’re done. Or
- You can click the box to assign the shift to as many people as you want
- Choose the team member/s you want to assign to the shift
- Click “Assign [#] members” at the top right of the screen
- When the shift details are correct, click “Post”

If you decide to leave the shift unassigned at the time you create it, you can easily go back later and assign it. Follow the steps below.
Assign a Shift After You’ve Created It
- Click on the appropriate blue shift box
- Click “Edit” at the top right of the screen
- If necessary, choose “Just this shift” or “All instances of this shift”
- On the Edit Shift screen, click “Leave unassigned or assign to multiple people”
- Choose the team member/s you want to assign to the shift
- Click “Assign [#] members” at the top right of the screen
- Click “Save” on the Edit Shift screen

Clearing the Schedule to Assign Future Shifts
When you have recurring shifts, you may want to clear the shift assignment designations so that you can assign different people to certain shifts on future dates.
Clearing the Schedule
- From the Agenda view of your desktop Calendar tab, choose a future date range from which to begin to clear assignments
- Select the appropriate blue shift box
- Click “Edit” at the top right of the screen
- Choose “All instances of this shift”
- Click “Edit assignees” at the bottom of the Edit Shift screen
- Uncheck all assignee boxes
- Click “Assign 0 members” at the top right of the screen
- Click “Save” on the Edit Shift screen
Repeat this process as needed with other shifts.
Note Beginning from the date range you’ve chosen, all subsequent assignments of this shift will be cleared.
Here’s how to clear the schedule so that you can change the assignments
Getting Shift Coverage From the Agenda View
To Request Coverage
- Click on the appropriate blue shift box
- Click “Get Shift Cover” in the middle of the screen.
If you don’t have a shift created on the Calendar, you can still request shift coverage. This can be useful when Crew is being used for shift coverage but not shift creation. Simply click on the “+” button and choose “Get Shift Coverage.” From here the details of the shift will have to be input manually.
What Happens Next
Admins will see the coverage request in the blue shift box.
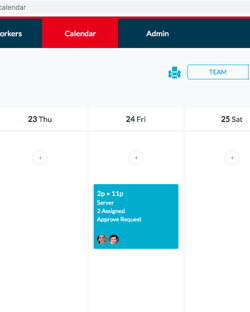
Managing a shift-cover request
One of two things can be done with the request.
- By clicking on it, the shift can simply be reassigned. See “Assign a Shift After You’ve Created It” above for steps to follow.
- Or, a team member can request to cover the shift. The team member would
- Click on the shift in the Coverage View of the Calendar tab
- Click “Request Shift”
An Admin can then change the status of the shift by agreeing that the second person can cover the first. This can be done from either Catherine’s request to get coverage, in the example, or Clarence’s request to give it. An Admin can also “deny” the request.
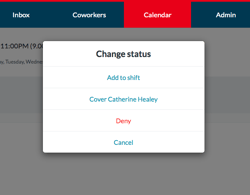
Here are the options for response
Requesting Time Off From the Agenda View
To Request Time Off
- From the Calendar tab on your desktop
- Click the “+” button on the desired date
- Select “Request Time Off”
- Input the dates, and any comments that might be necessary
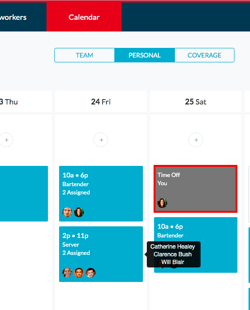
A time-off request shows up in the Calendar tab
What Happens Next
An Admin will see the time-off request in the Team View of the Calendar tab. The request can be responded to by clicking on it, where there will be the option to either “Approve” or “Disapprove.”
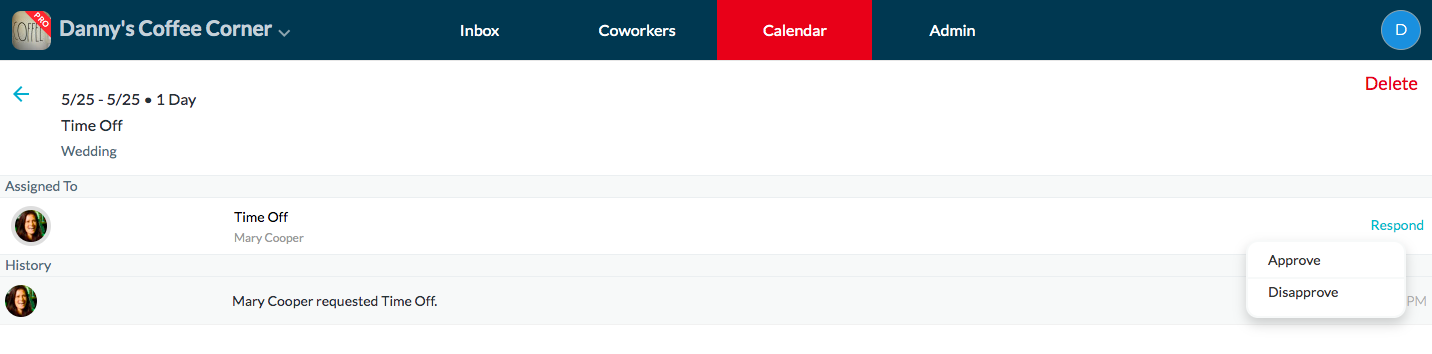
The Admin can either “Approve” or “Disapprove” the request